Hi Guys,
Happy Friday.

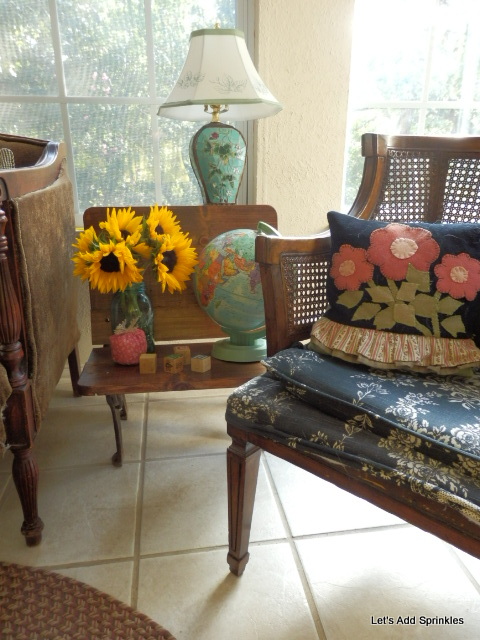
Here's the reveal of the new side table in the living room.

I showed you my "new to me" bedside table two weeks ago.
I think it's Empire or Victorian. I'll have to do some research and get back to you. I just love it.
Below is a picture of our old bedside table which in reality is only nine years old.

It was mountain cabin meets suburban life. I just made that up but it's from Lane and I cannot for the life of me remember the name of this collection. I've even tried to search for it online but it appears to have been scrubbed from the internet. Probably because the tops of these are CR@P - bad word alert!

I was very careful not to put a water glass on my nightstand but of course I forgot a couple of nights when I was tired. I think a vase also tipped over but I can't remember.
He was already gone by the time we got these, but we had a cat that would drink out of our water glasses at night. I think he would deliberately spill them to wake us up but he's gone on to the afterlife. I don't think he is spilling any water where he ended up, if you know what I mean.

Anyway back to our tall table tale. The tops bubble and chipped.
Bill wanted to give mine away but what kind of blogger would I be if I did that?
My brother and sister in law have pieces from the same collection out at their lake house.
My SIL's table has bubbled up as well which means this was not just a fluke.
I slid the table out to the garage. Here is my tip for moving big, heavy pieces of furniture. Flip it over and slide it. I've moved ginormous stuff down the stairs with this method. Put it on a blanket to slide stuff across wood or tile.

I used CitriStrip to remove the finish. It isn't quite as potent as the old hazardous stripper but it also doesn't require a skin graft if you accidentally get it on you. I am kidding here - sort of. The fumes won't make you pass out either.
Patience is required. I usually pour some on, brush it all over and then let it set for a while.
In a rookie move, I did the top first. The top is the easiest so it should be left for last.
It was all going okay until I got to the doors. The raised part of the panel was made of plastic.
It started to melt a little with the stripper. Bill and I decided the doors had to go.
He even said something like "Cheap cr#p!"

Stripping is a messy job. I used a scraper and globbed the stuff into the trash. Once everything is stripped I gave it a quick wash with warm soapy water.
At the end of the first day most of it was stripped. I still needed to strip the shelf because now it was going to show.

The rest of it was waiting for a finish.

I couldn't resist staging the shelves to see what they will look like. The finish reminds me of some of the Jacobean revival furniture that I've refinished over the years. I thought about trying a Restoration Hardware type of finish but I felt that the color that it was too dark for that.

The next morning, after my coffee, the piece got a good sanding with our orbital sander.
One of the bubbled areas still has a slight flaw but it is so much better.

It didn't take any time at all to prime the surface to get it ready for paint. The primer dries in about an hour. I put the knobs on it to see what it was going to look like when it was painted.

Cute.

While the paint was drying, which took forever, I refinished the pull.
The pulls on these were oil rubbed bronze. I spray painted them silver and then gold at Christmas in an effort to see if I liked this piece enough to refinish it. This was before my blogging obligation kicked in.

It turns out the pulls were originally brass coated over silver. It goes well with the blue and white porcelain knobs that I found at Hobby Lobby.

Cute so far. It took about three days for the paint to dry. It stayed tacky a long time. Probably because it wasn't fully dry from the stripper.
The paint color is Snowbound by Sherwin Williams. This is a nice bright white with cool undertones instead of warm. It's the same color that is on my kitchen cabinets. The rest of our painted furniture has warm undertones.
On Thursday, it was dry enough to drag into the house. I pushed it into the dining room so that I could begin to decide where to put it.

Wouldn't this be a cute wine bar in a dining room? I can visualize those criss cross things to hold wine in the bottom niche.

It stuck out too far into my dining room but what a great use for an old piece.
You could put openers and stoppers in the drawers.


I tried it next to the couch in the living room next but that didn't work either.
It ended up next to my recliner.

This is great. The narrow drawer is perfect for my iPad and phone. The big drawer holds my camera and chargers. There is also a little pillow in there for nap time.


Cute, cute, cute!

That's what I did last week.
I can't wait to show you what I worked on this week.

Look at how cute Dixie looks. She thought she was in trouble.
Follow me on Instagram for up to the minute updates.
I'm trying this YouTube thing too.
Starting out on these other platforms is depressing.
Love y'all. I appreciate you so much.
Have a great day!
Katie