
I shared with you how I have been freshening up our home since all the kids moved out.
I told you about my bathroom update, but I also have been working on an update to the former kid's bath.
I needed to repair a bit of the tile before I could get to some much needed painting.
I needed to repair a bit of the tile before I could get to some much needed painting.

This was only a small repair (two tiles) but I needed to replace the nasty sheet rock.
After much thought I decided to put my big girl tool belt on and fix it before my brother and his wife came. I removed three of the tiles. I went up one tile higher than I needed to in order to make sure I got all the ruined sheet rock and so that I had room to stick it in.The tiles popped right off but I was super careful with them because I didn't think I would be able to find replacements for this gray tile after 20 years.


I used drywall screws to attach the new drywall.
I used tile adhesive to reattach the tiles. This came in a tub from Lowes. There was no mixing or anything, it was ready to use.

To fix the wall I used joint compound.

I feel like a preschooler with a brand new glue stick every time I use it. :)

It took a bit to match the existing orange peel texture.

It was even primed.
I can't remember the last time I painted in this bathroom.
Umm... When was sage green in vogue?
My old neighbor gave me a can of paint years ago. She was going to use it paint her powder room but found a color she liked better.
It was a pretty color and it held up to three teenagers pretty well.
I found the can under the sink and was surprised to find that it was Color Place by Walmart.
I found the can under the sink and was surprised to find that it was Color Place by Walmart.
I am impressed.
It lasted 14 years or so.
It lasted 14 years or so.
But it was time for a change and time to lighten up.
This is my huge stack of paint samples. I tried to find a gray in just about every brand.
 I love gray for a neutral. I knew gray for this bathroom would be hard because there are no windows. I wanted to avoid a gray that would read blue in a dark space.
(Bill's office reads blue.)
In the end I just grabbed one.

(Bill's office reads blue.)
In the end I just grabbed one.
Good news it doesn't read blue, but it reads a little green.
 It's not exactly what I wanted but it looks lovely.

A very soft greenish and in some lights aqua.
It could be that my eyes see green because of the green room next door.
 I used a paint and primer and gave it three coats so I doubt it is picking up the green of the old color.

It only took about an hour to paint this tiny area.
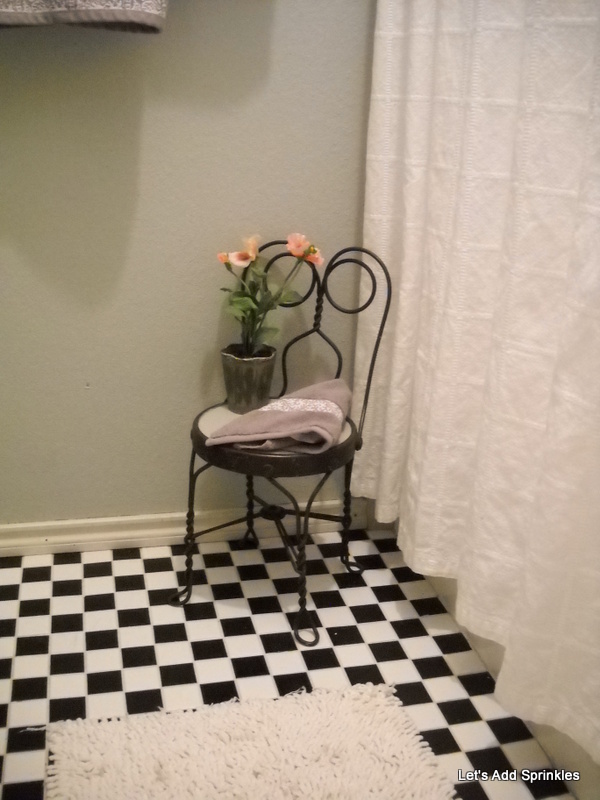
I love the little chair to hold a towel.


I rubbed the paint on and wiped it off to let the gold underneath still show. I am sure others call this dry brushing. ;)
I have such happy memories looking at this painting.
This was our first piece of original art.
The black and white checked floor was my second tiling job.
The small tiles were perfect for a novice. They were easy to cut. I even did it with a tile snip.
 It goes well with the black walls in the sink area.
 This area is about to get a new counter so I will save that reveal for another day.
The light fixture was rusted from many steamy showers.
I had to break off the metal holding it on.
This was our first piece of original art.
The black and white checked floor was my second tiling job.
The small tiles were perfect for a novice. They were easy to cut. I even did it with a tile snip.


The light fixture was rusted from many steamy showers.
I had to break off the metal holding it on.

This vintage cutie was $3.00 at the thrift.

One more look at the after of the damaged wall.

I kind of thought this was beyond my skills.
I hope you will give something like this a try. It wasn't as hard as I made it out to be.
Sprinkled with gray/green,
Katie
Linking with,
French Country Cottage
Pretty guest bathroom! What a cute light fixture to and a steal!
ReplyDeletexx
Anne
Does yоuг site havе a contact page?
ReplyDeleteI'm having trouble locating it but, I'd likе to ѕend you an е-mail.
I've got some creative ideas for your blog you might be interested in hearing. Either way, great site and I look forward to seeing it grow over time.
Visit my weblog - pikavippi
Also see my site > pikavippi