We didn't mean to redo our kitchen in phases.
It just turned out that way.
I didn't have a long range plan but tackled it project by project over a period of years.
It was a time consuming process that could be accelerated.
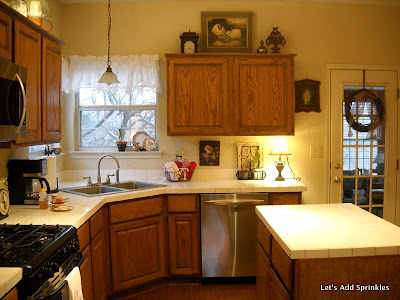
We started with orange oak cabinets, formica counters, black and almond appliances and vinyl floors. Did I mention the dark green wallpaper?
It was only 3 years old when we bought the house and still in style but dark green wasn't my scene.
How cute are these cousins?
The first thing to go was the wallpaper.
I stripped it off, textured the walls and painted them yellow.
This was the only picture I could find of the old kitchen.
Jonnie was 15.
The next thing to go was the flooring.
This was the only picture I could find of the old kitchen.
Jonnie was 15.
The next thing to go was the flooring.
We ended up with a wood look vinyl.
It has been a work horse.
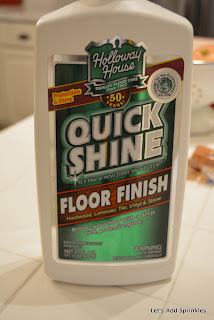
Regular mopping and an occasional cleaning with Quick Shine keeps it in good shape.
It has been a work horse.
Regular mopping and an occasional cleaning with Quick Shine keeps it in good shape.
I got to the point where I couldn't live with the gross formica countertops one more day. I decided to tile them.
I love the 50s vintage vibe.
I also created the open storage. Read that post here.
The formica layer peeled off in one big sheet.

I didn't do any prep work to the remaining plywood base. The tiles adhered just fine. I've never had one pop off.

I love the 50s vintage vibe.
I also created the open storage. Read that post here.
The formica layer peeled off in one big sheet.

I didn't do any prep work to the remaining plywood base. The tiles adhered just fine. I've never had one pop off.

It took about a year to get to the sink corner. We placed the plywood base around the sink because it had water damage and mold.
I got a new Elkay sink that I still love.
This was just a tad before farmhouse sinks came into vogue but I doubt one would have worked in the corner anyway.
At this point I was pretty content with the kitchen. I was wild about Robin's Egg Blue and brown and this scheme pleased me.
The appliances got replaced as they bit the dust.
Replacing them all with stainless took about 5 years.
The kitchen stayed blue for 6 years until someone mentioned to me that blue kitchens were unappetizing.
That gave me the motivation to paint.
For the record, I never had a problem eating in a blue kitchen. ;)
I wanted something neutral so I could fill up my shelves with red transfer ware.
I finally convinced my husband to let us paint the kitchen cabinets.
I pinned picture after picture of cute kitchens.
I realized that all of them were white. ALL OF THEM.
I was just attracted to white.
I realized that all of them were white. ALL OF THEM.
I was just attracted to white.
My final plea came when I expressed that the orange-y oak cabinets had had a good life and that they would not be in style again in our lifetime.
That is just the way it works. It takes decades for a design element to come around again.
Decades - if ever!
Since we don't plan to be here in 3 decades,
(if we are still breathing in 3 decades)
he relented.
(if we are still breathing in 3 decades)
he relented.
He is glad that he did because we love the white cabinets.
We love how bright and open it looks.
We made a faux vent hood.

We will splurge and get stone counters but I'm not sure when he will spring for that.
We love how bright and open it looks.
We made a faux vent hood.

We will splurge and get stone counters but I'm not sure when he will spring for that.
In the meantime, I think I might do a tile backsplash.
Maybe.
Here is a breakdown of the cost:
Sink $400
Counters $200
Painting cabinets $1850
Appliances $3200
Paint is Kilim Beige by Sherwin Williams
Cabinets are Dover White by Sherwin Williams.
I think it's a pretty frugal remodel. I love my kitchen.
Thanks for stopping in to see it.
Maybe.
Here is a breakdown of the cost:
Sink $400
Counters $200
Painting cabinets $1850
Appliances $3200
Paint is Kilim Beige by Sherwin Williams
Cabinets are Dover White by Sherwin Williams.
I think it's a pretty frugal remodel. I love my kitchen.
Thanks for stopping in to see it.


